Easy steps to learn Auto Layout Xamarin.IOS

Best practices to be followed while creating a storyboard or XIB in Xamarin.
To begin with creating a Controller.
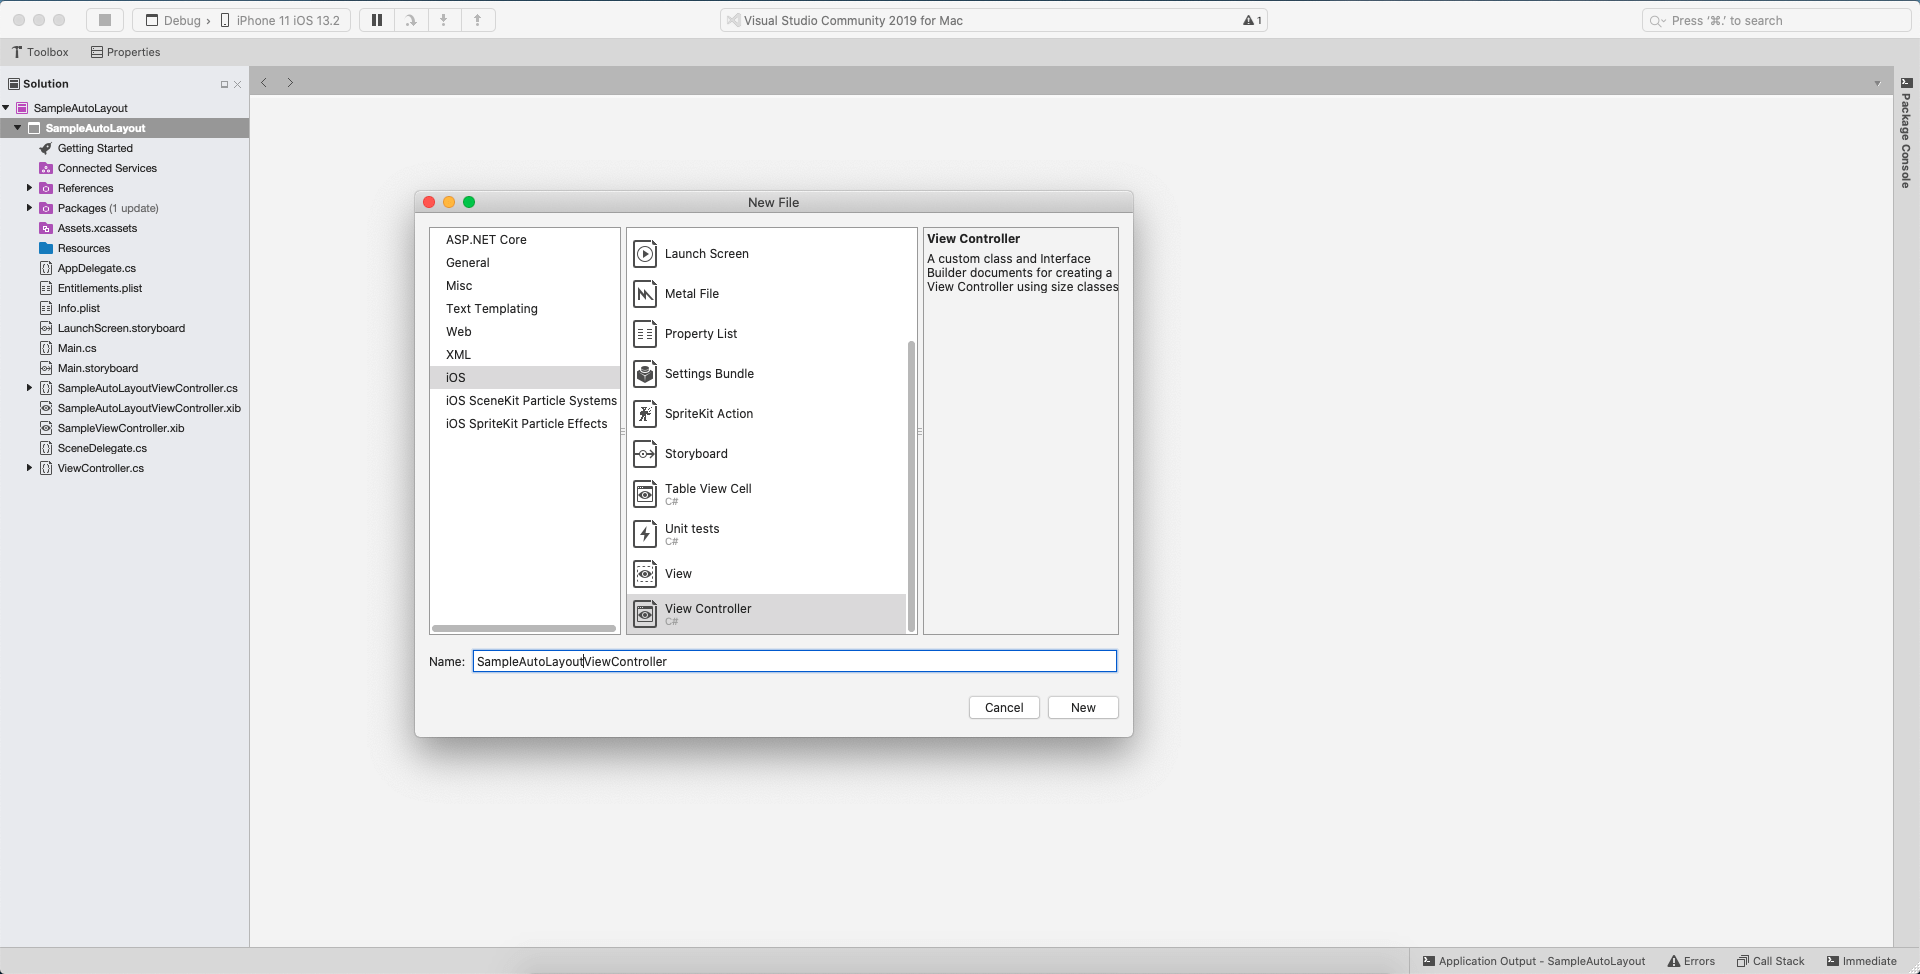
To design using XIB, right click on the controller and open with Xcode Interface builder.
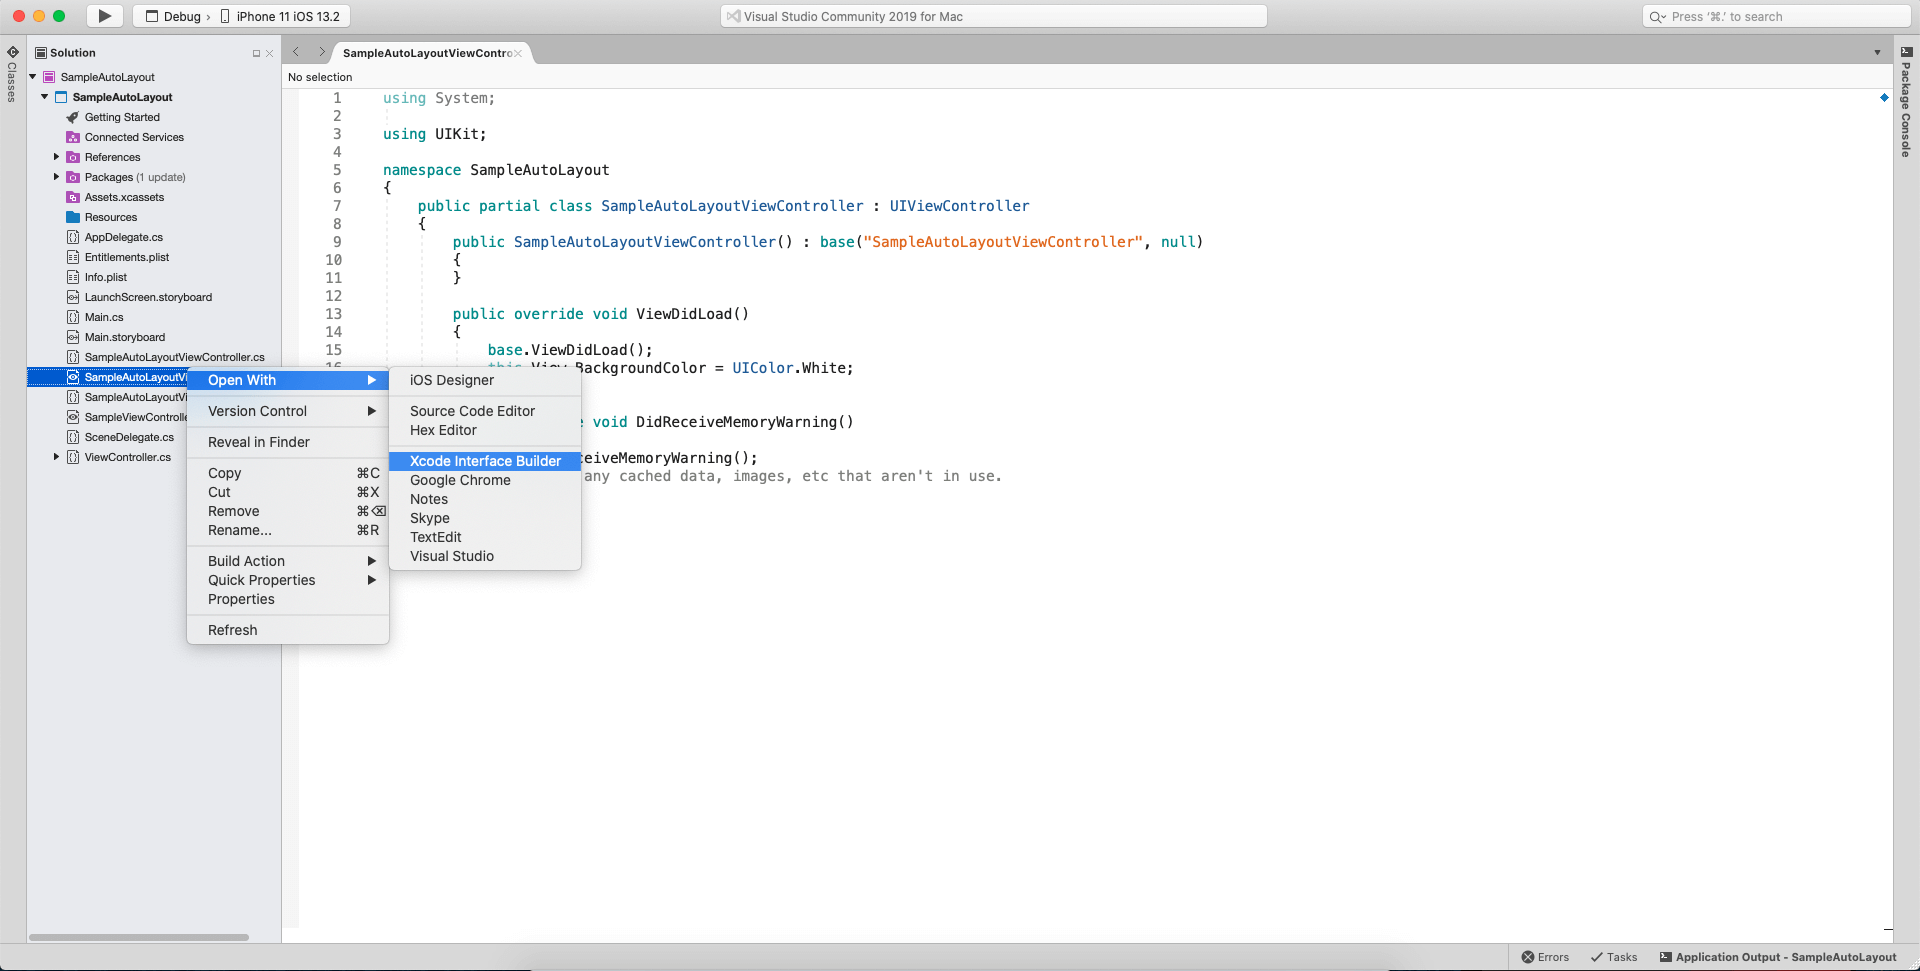
To use Xib to run application, need to add a UINavigationController to Window’s RootViewController. Now, we need to add our SampleAutoLayoutViewController into the UINavigationController.
Code as follows:
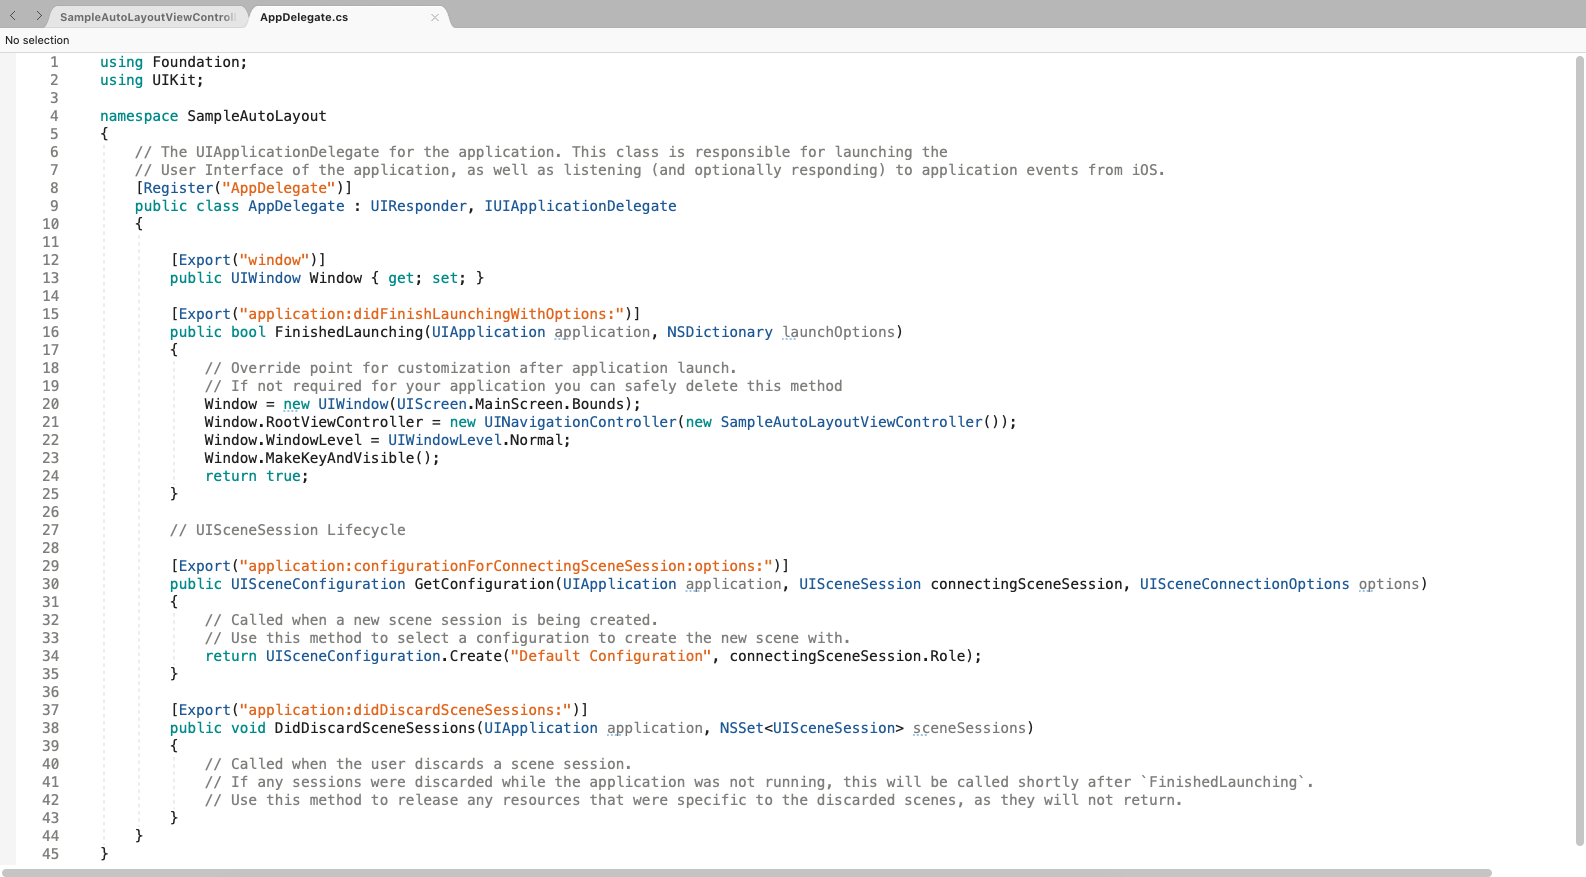
Let’s say, we have 3 buttons, each button will have equal height (i.e 40).
Generally we will give height to each button as 40, but here we can shorten the steps and make it dependent on one button only. We can give a height to one of the buttons and can assign equal height to other buttons.
Let’s have a look, Assign height to the first button as 40.
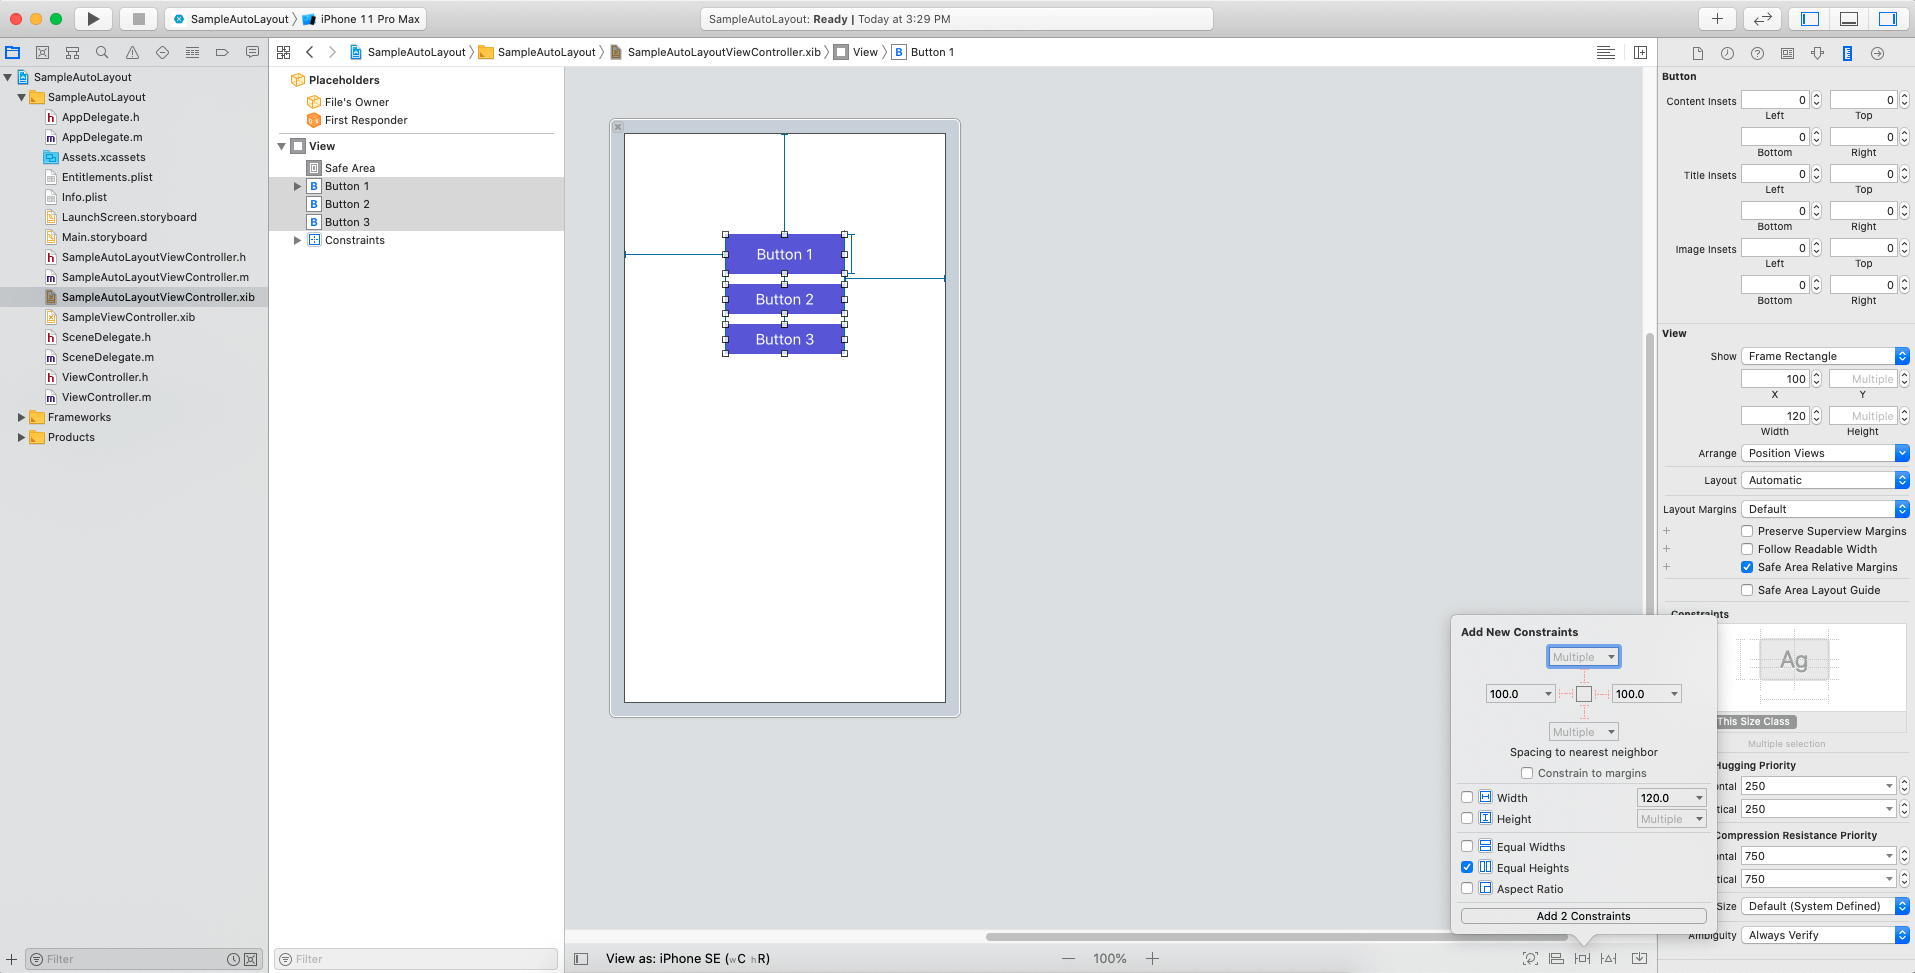
Select the top button, hold the Command key and select the other 2 buttons. Or after assigning the height to the first button, we can select all buttons together and click on “Add New Constraints”, select Equal Heights and tap on Add Constraints.
By doing this, we don’t need to change all buttons height whenever required, We just need to change height of the first button, it will automatically reflect the other two buttons.
Another way to do the same is, just select the button to which we want to give relative height. Refer following image.
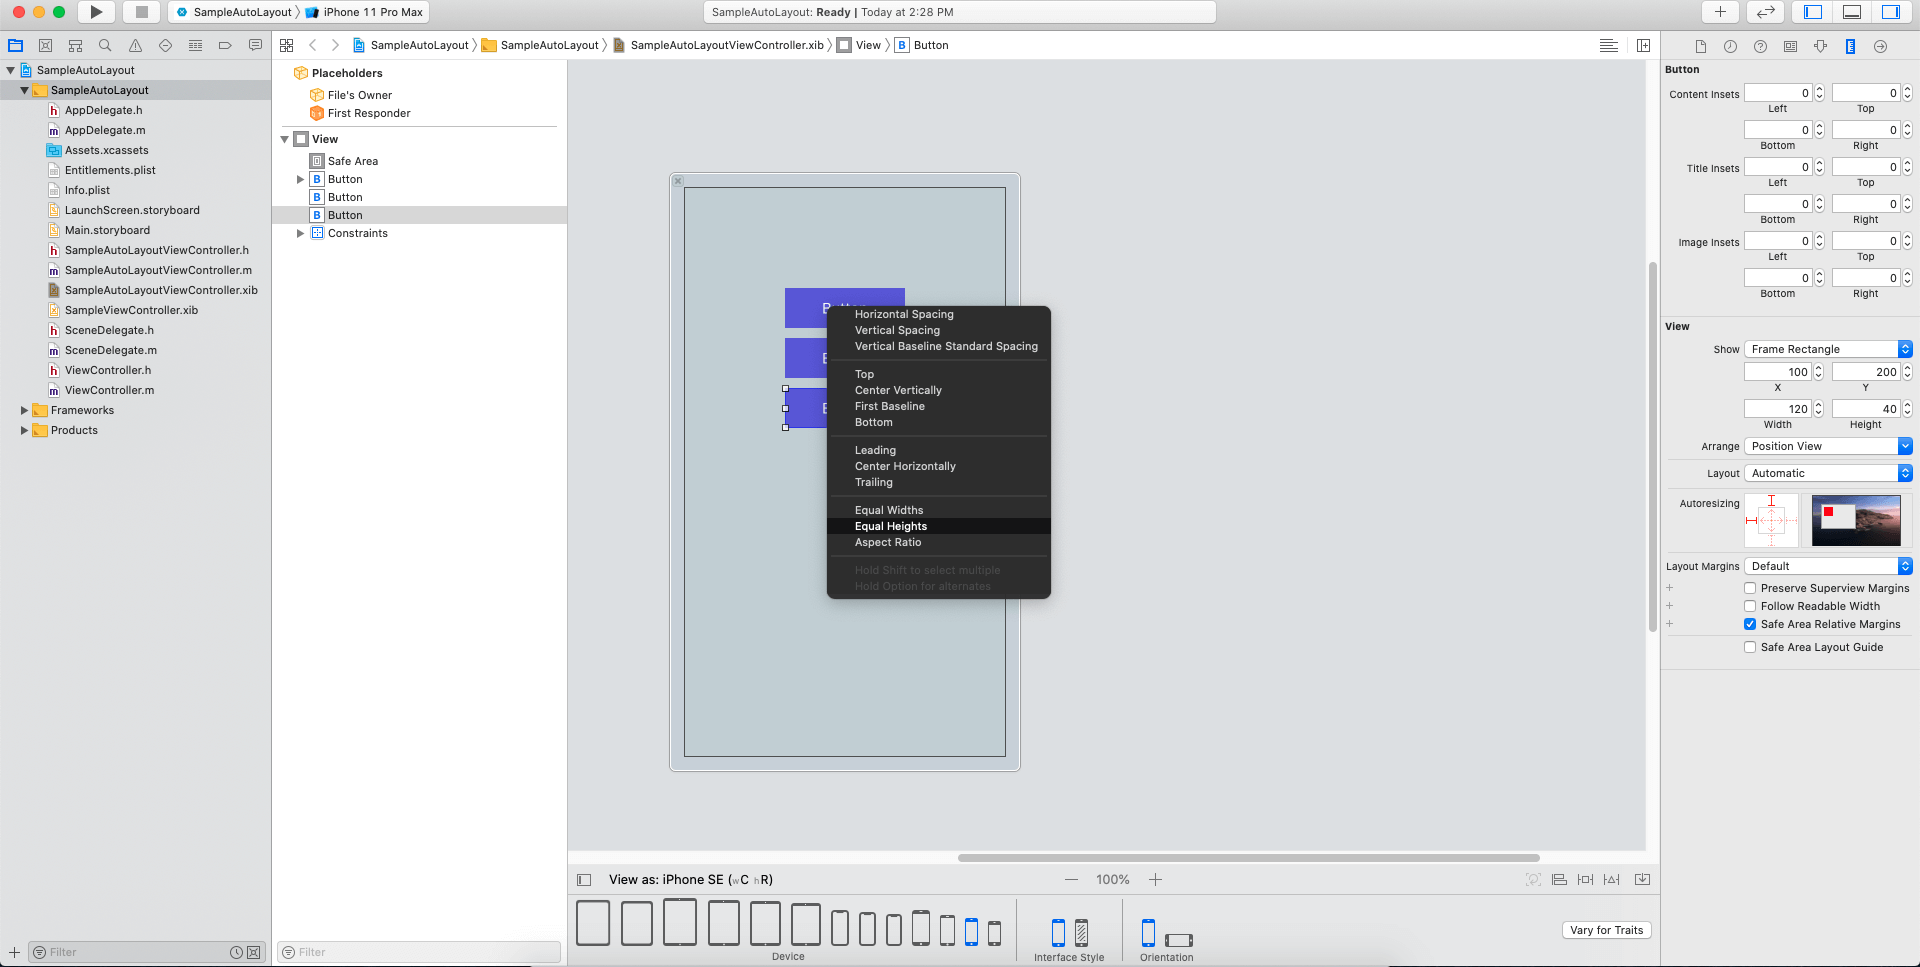
Now, let’s say we want to assign the same leading and trailing alignment to the buttons.
Consider for Leading constraint:
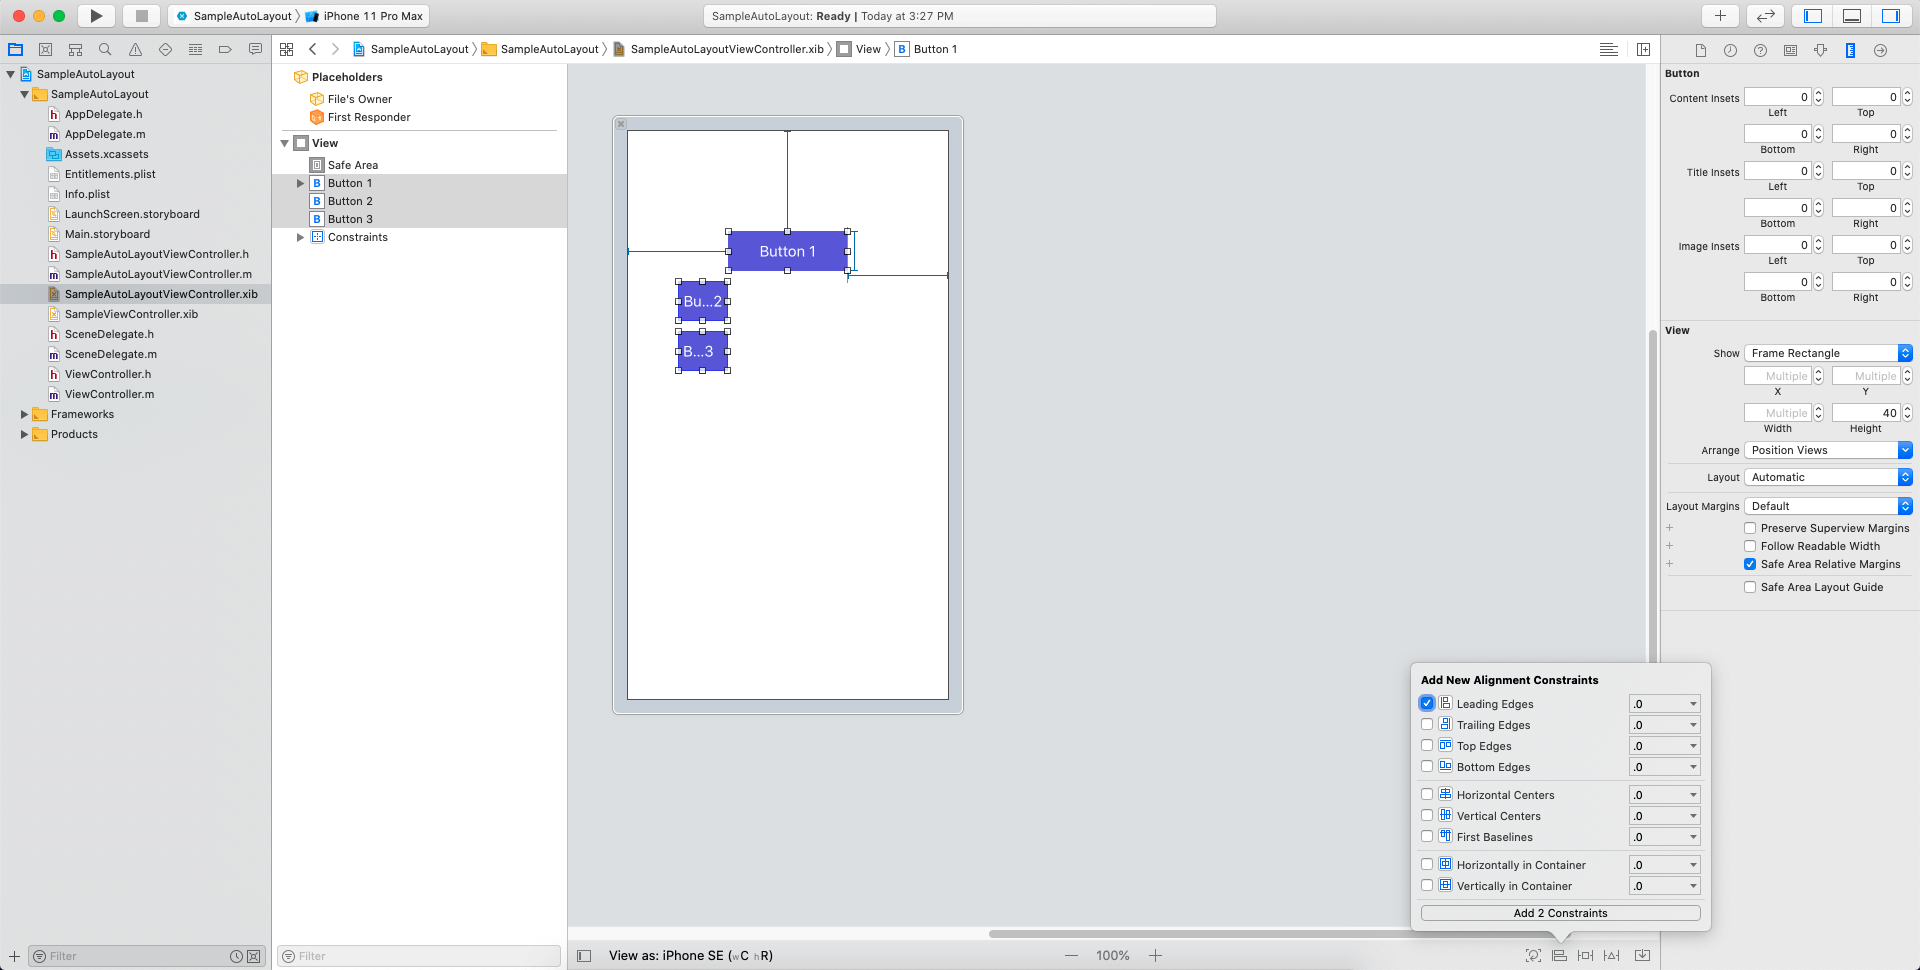
Consider for Trailing constraint:
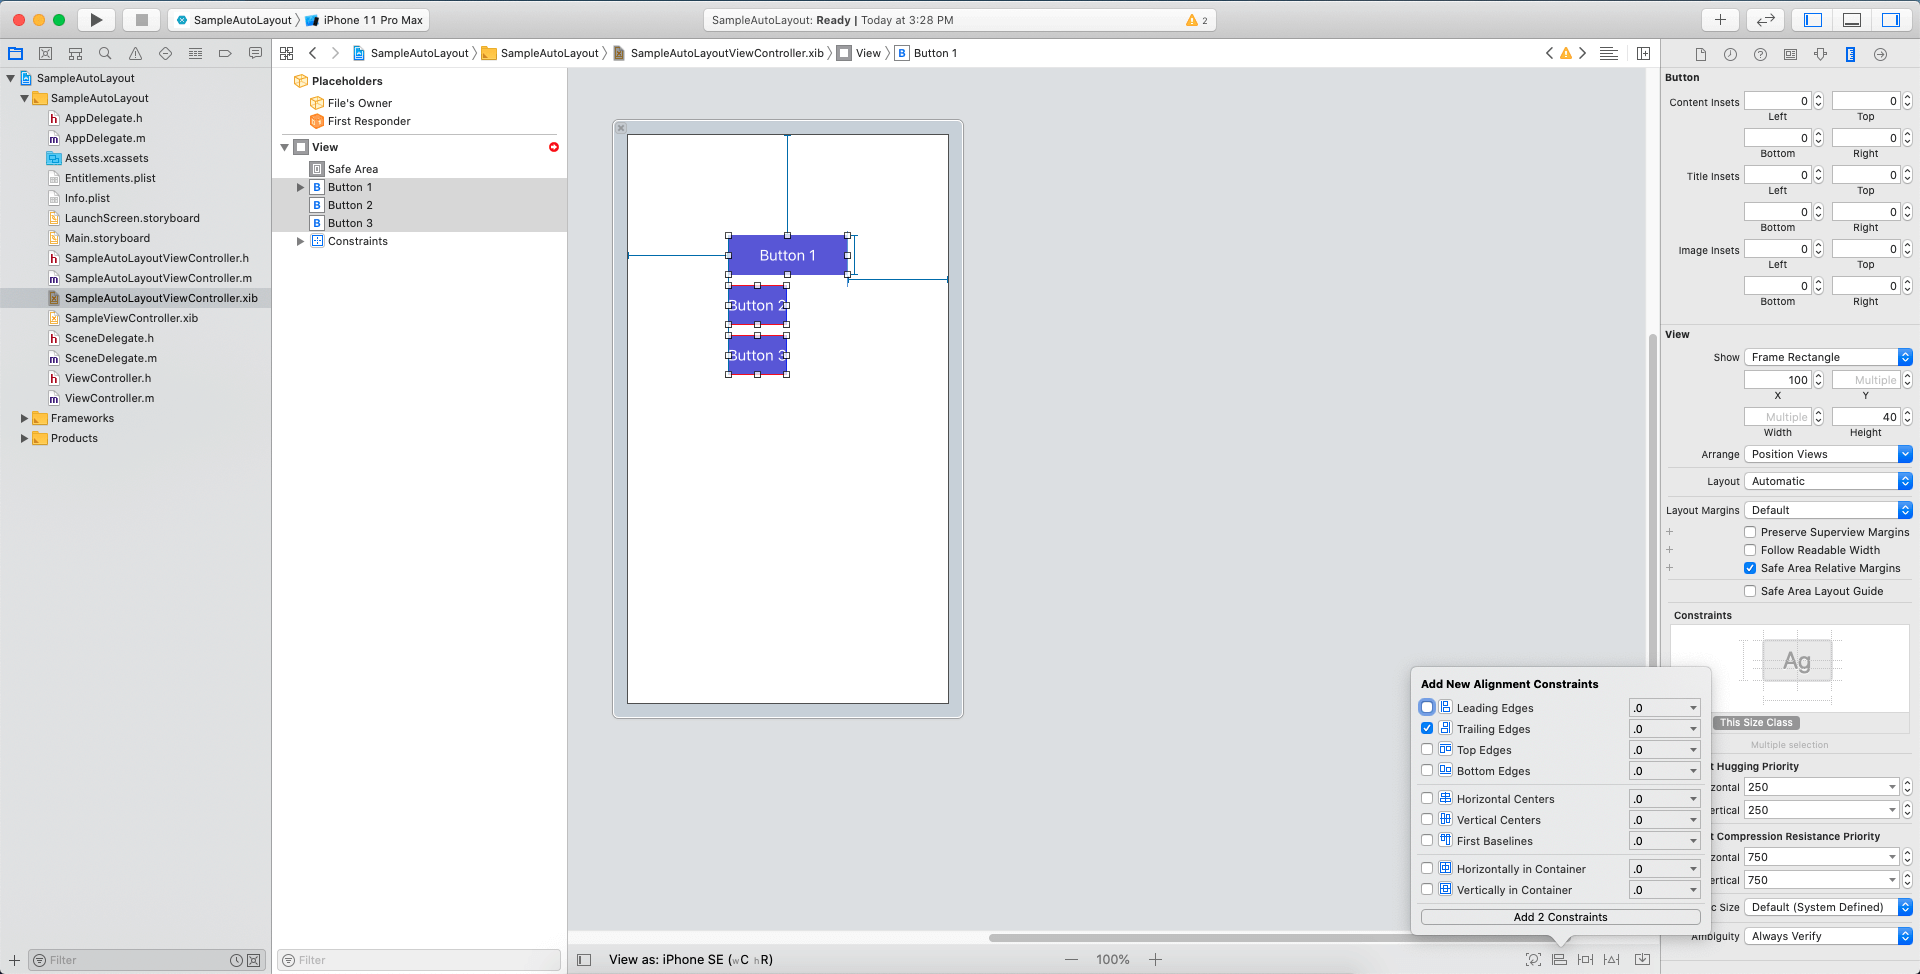
Select the top button and assign the Leading constraint and Trailing constraint.
Later select all buttons together, by holding command key and select other 2 buttons Or select all buttons together and Click on Leading edges from “Add New Constraint” and Add constraint.
We can follow the same steps for Trailing constraint too.
Now its easy to change all buttons Leading, Trailing constraints by changing only One button constraint as other buttons are set with respect to the Top(First) button.
This blog is meant to make your autolayout task easier and quick.
Enjoy Coding 🙂
Join 10,000 subscribers!
Join Our subscriber’s list and trends, especially on mobile apps development.I hereby agree to receive newsletters from Mobmaxime and acknowledge company's Privacy Policy.
