Entity Framework with Code First Approach in MVC
Entity Framework is an open source ORM Framework supported by Microsoft. It’s providing a facility to developers to deal with Databases by using that class instead of the database table.
It’s providing three type of Approaches:
- Code First Approach
- Model First Approach
- Database first Approach
Today we are going to get detailed knowledge about Code First Approach.
As the name suggests in Code first approach, the developer has to focus more about domain classes instead of database tables. Based on this domain classes database generated automatically. Means developer has full control on that code. There is no dependency on automatically generated code.
If the domain classes are ready in Application, I would always prefer this approach as you can easily create your database from the domain classes.
5 Easy steps we need to do this:
- Creating a blank database
- Creating a MVC Project (UI)
- Code First Approach implementation
- Migration in MVC
- Creating CRUD Operation
Let’s Check in details.
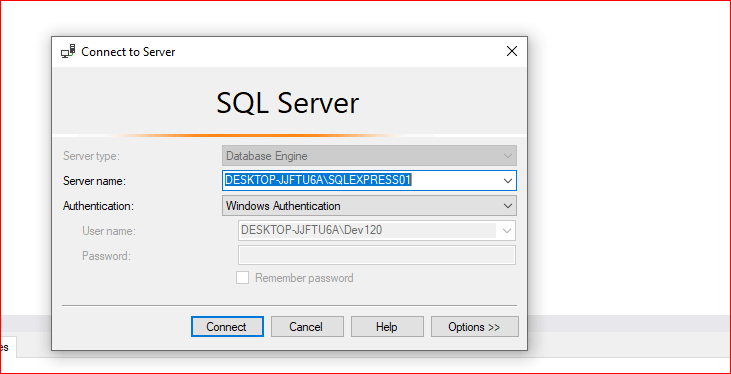
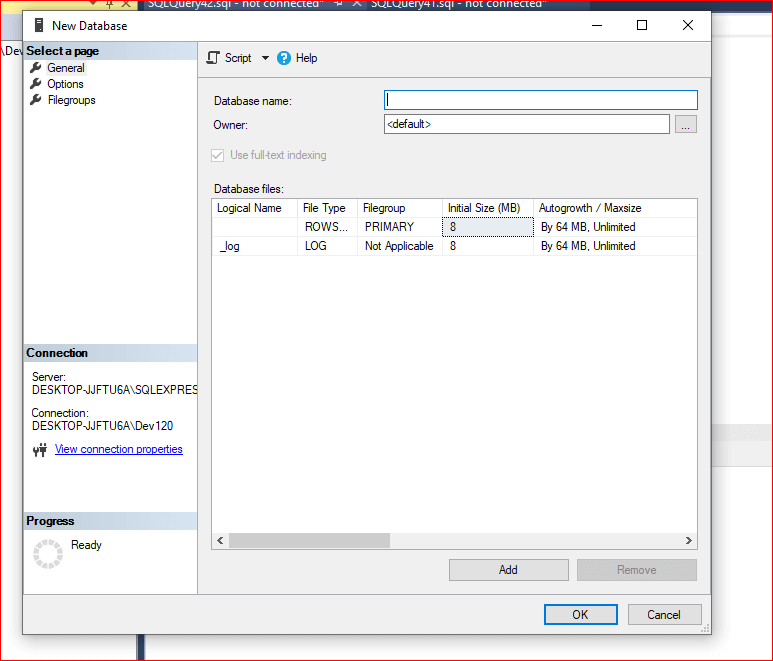
Step 1:
Here we are creating a Blank database with the name Product.
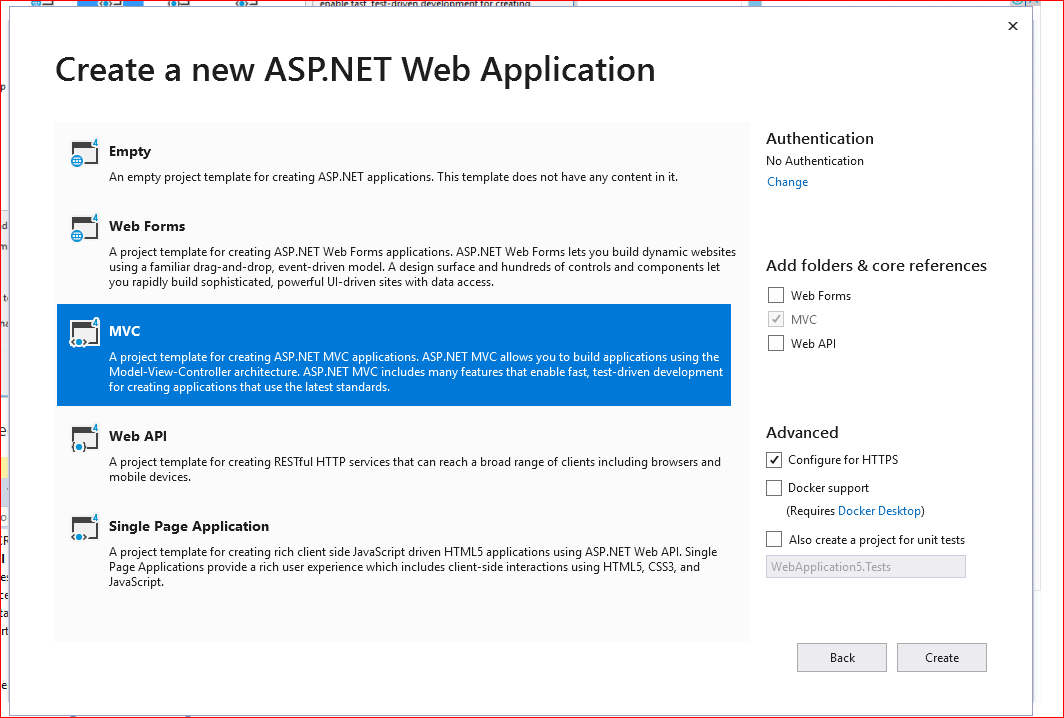
Step 2:
Go to File => New Project.
- Select Visual C# => Web => ASP.NET Web Application.
- Name your Solution and Project and then click OK.
- Select MVC.
Step 3:
Create a class file having the name Product.cs and add the below line of code into your class file.
public class Product
{
public int ProductId { get; set; }
public string ProductName { get; set; }
public string CategoryName { get; set; }
public string Price { get; set; }
public int Quntity { get; set; }
}
Create DB Context file in Model folder or any folder you want. Inherite that class with dbcontext .
public class Context : DbContext
{
public Context() : base("DefaultConnection")
{
}

public DbSet<Product> Products { get; set; }
}
DefaultConnection is the name of a connection string in your config file. In the config file you have to add the below line of code for connection string.
<connectionStrings>
<add name="DefaultConnection" connectionString="Data Source=DESKTOP-JJFTU6A\SQLEXPRESS01;Initial Catalog=ProductInfo;Integrated Security=True" providerName="System.Data.SqlClient" />
</connectionStrings>
Step 4:
Now your class and context files are read. So now we are going to implement migration for creating tables in the database from our class file.
for this we have to follow 3 commands in the nuget console.
-
Enable-migration
-
Add-migration ‘create product table from product class’
-
Update-database
Now after performing these three commands your table has been created in Database.
Step 5:
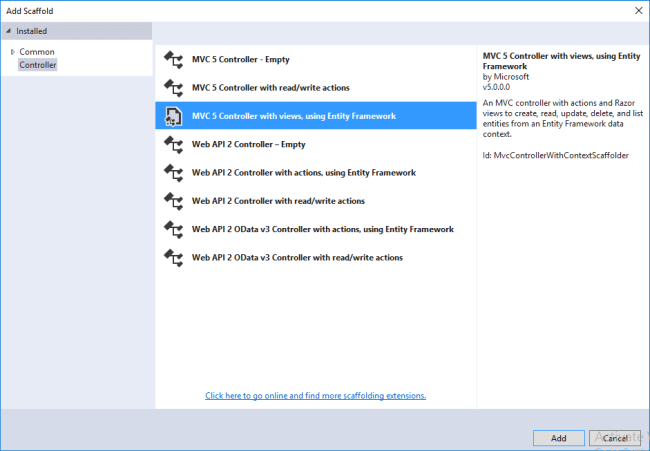
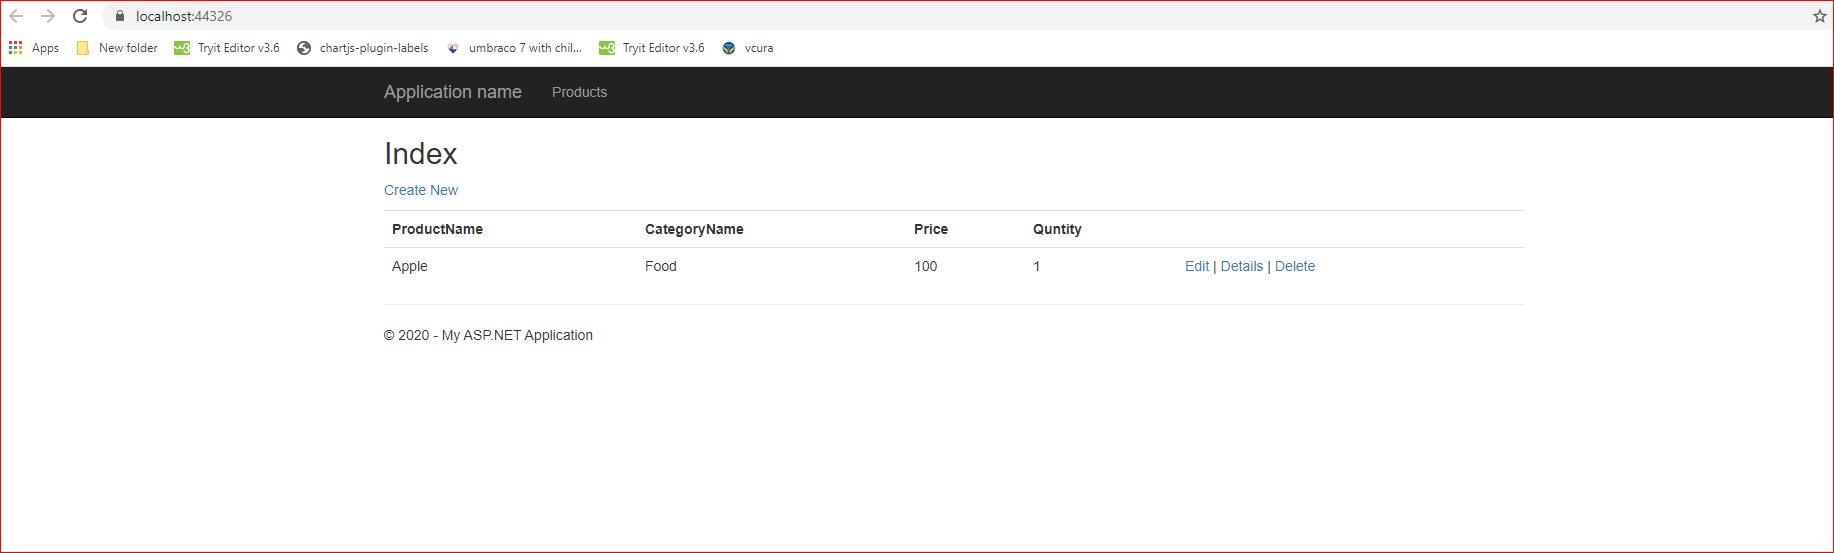
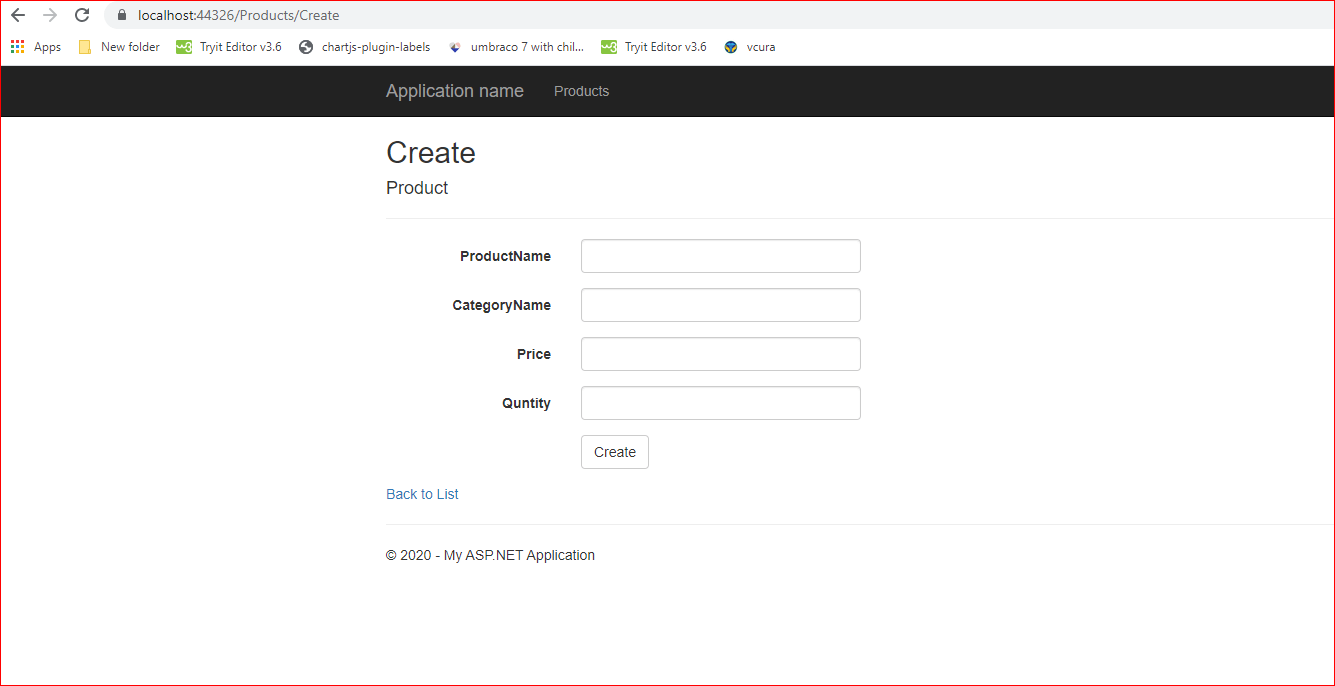
Now we are going to create a controller in the controller folder. At the time of controller creation, you have to select create controller with view and entitity. By this option we do not need to create view and crud method in controller file. it’s automatically created from the model class file you selected at the time of controller creation.
Now build your project and run.

Sample project ZIP:

Video:


Enjoy Coding 🙂.
Join 10,000 subscribers!
Join Our subscriber’s list and trends, especially on mobile apps development.I hereby agree to receive newsletters from Mobmaxime and acknowledge company's Privacy Policy.